Adobe Audition is a powerful audio editing software that is widely used for tasks such as recording, editing, and mixing audio. Here are some basics to help you get started with audio editing in Adobe Audition:
### 1. **Installation and Setup:**
– Install Adobe Audition on your computer and launch the application.
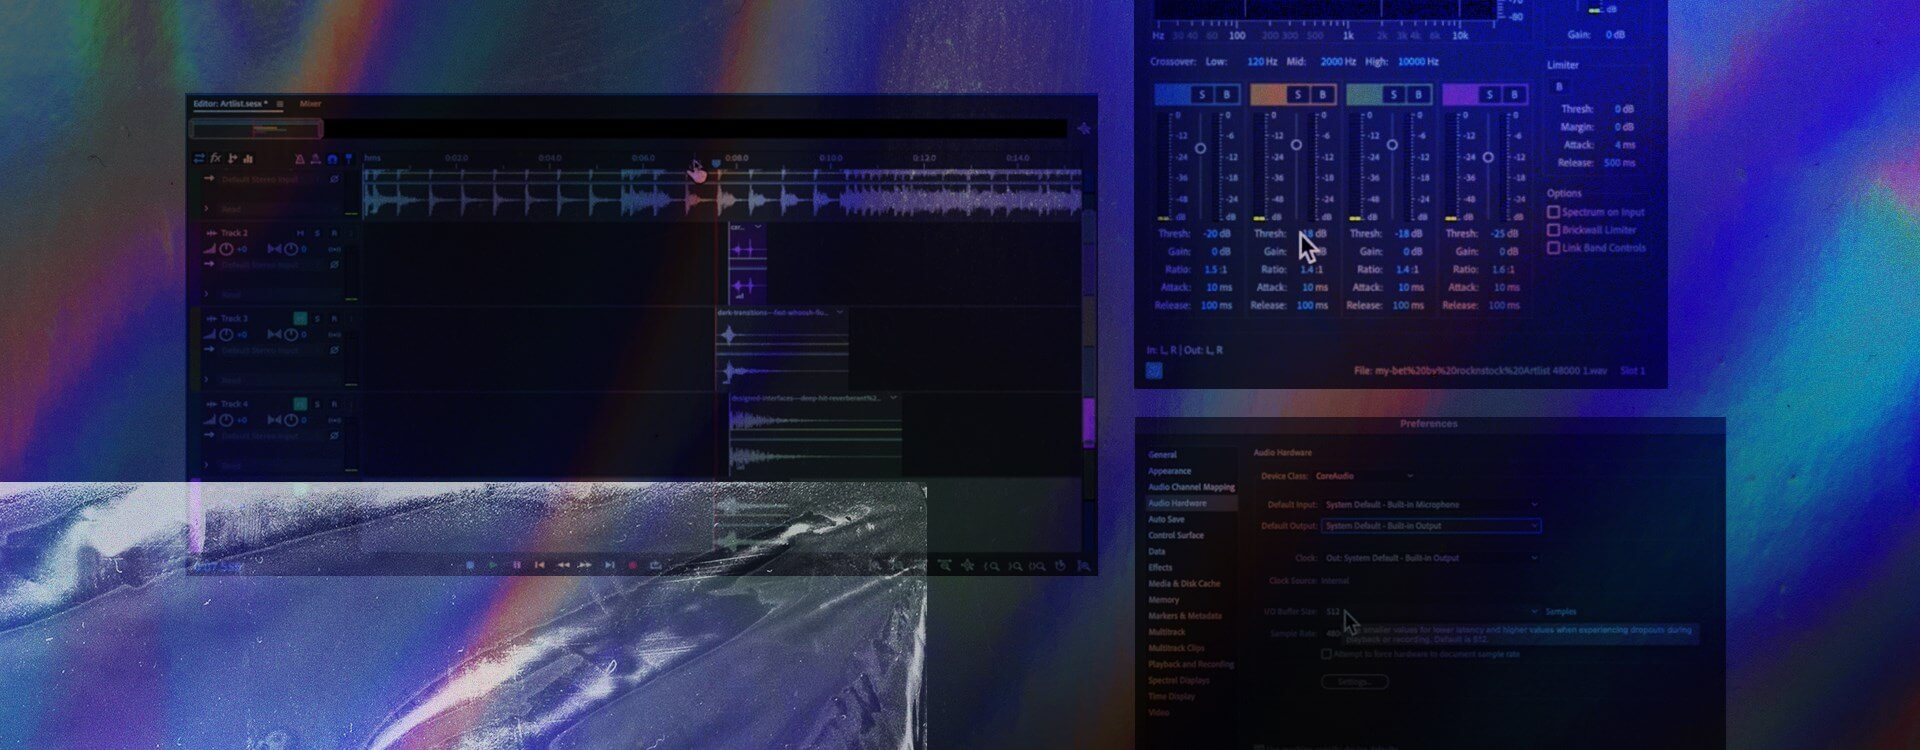
– Set up your audio input devices (microphones, audio interfaces) in the Preferences menu.
### 2. **Workspace Overview:**
– Familiarize yourself with the different panels: Files, Effects, Mixer, etc.
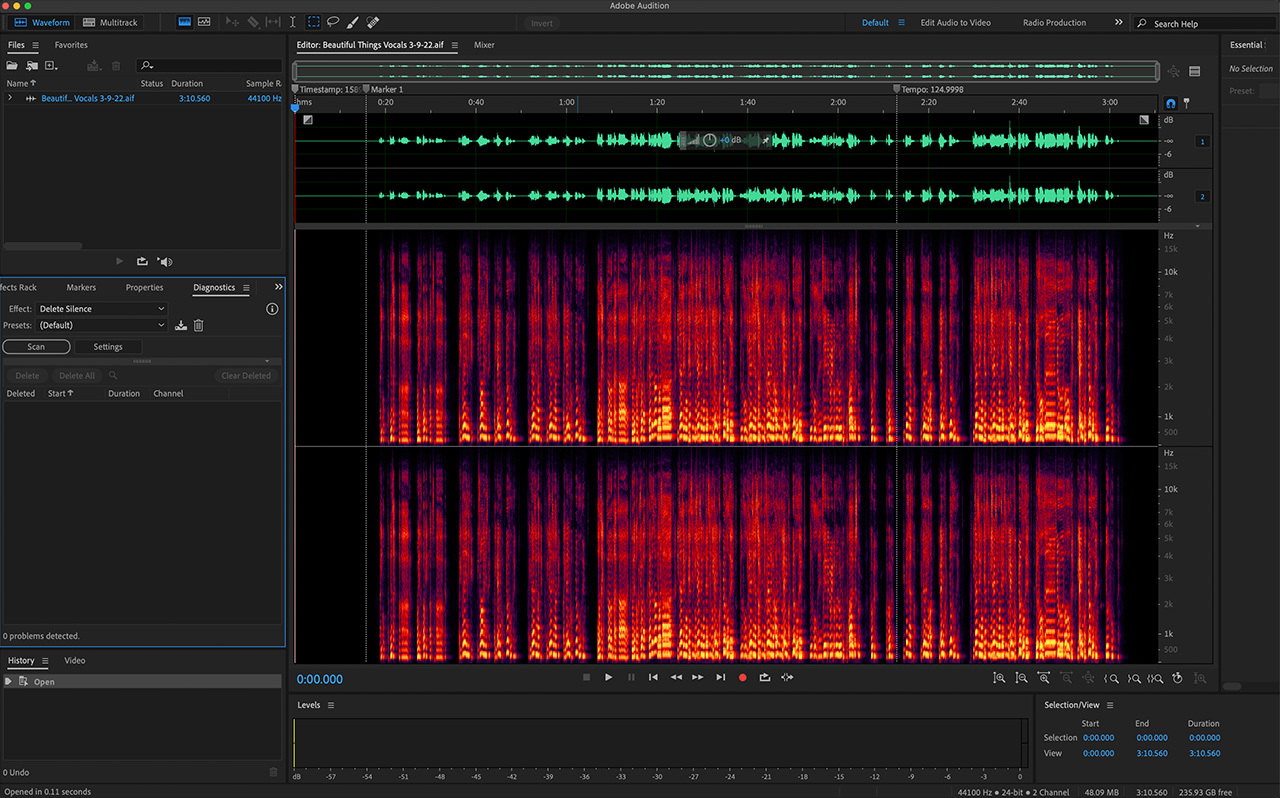
– Understand the main editing area where you will be working with your audio files.
### 3. **Importing Audio:**
– Use the “File” menu to import audio files into your project.
– Drag and drop audio files directly into the workspace.
### 4. **Basic Editing:**
– Select and cut portions of audio using the selection tools.
– Use the razor tool to cut audio clips at specific points.
– Trim and delete unwanted parts of the audio.
### 5. **Adding Effects:**
– Explore the Effects panel to apply various audio effects.
– Drag and drop effects onto your audio clips.
– Adjust effect parameters using the Effects Rack.
### 6. **Adjusting Volume and Panning:**
– Use the Mixer panel to adjust the volume and pan of individual tracks.
– Keyframe volume changes over time for more dynamic adjustments.
### 7. **Working with Multitrack Sessions:**
– Utilize the Multitrack mode for more complex projects with multiple audio tracks.
– Arrange and layer different audio clips in the multitrack timeline.
### 8. **Recording Audio:**
– Set up your recording preferences (input source, sample rate, etc.).
– Hit the record button to start recording audio directly into Adobe Audition.
### 9. **Saving and Exporting:**
– Save your project regularly to avoid losing your work.
– Export your final audio project in the desired format (MP3, WAV, etc.).
### 10. **Keyboard Shortcuts:**
– Learn essential keyboard shortcuts to speed up your workflow (e.g., Ctrl + S to save, Ctrl + Z to undo).
### 11. **Noise Reduction:**
– Use the Noise Reduction effect to clean up background noise in your recordings.
### 12. **Working with Markers:**
– Add markers to indicate specific points in your audio timeline (e.g., cue points, important sections).
### 13. **Automation:**
– Automate changes in volume, panning, and effects over time for more dynamic audio.
### 14. **Learning Resources:**
– Take advantage of online tutorials and documentation provided by Adobe to deepen your understanding of Adobe Audition.
By mastering these basic features, you’ll be well on your way to efficiently editing and producing high-quality audio in Adobe Audition. Remember to experiment and explore more advanced features as you become more comfortable with the software.