Adobe Audition is a powerful digital audio workstation (DAW) that is widely used by voiceover artists for recording, editing, and processing audio. Here are some best practices for voiceover artists using Adobe Audition:
1. **Optimize Your Recording Environment:**
– Choose a quiet space with minimal background noise.
– Use a good quality microphone and pop filter to reduce plosive sounds.
– Consider acoustic treatment for your recording space to minimize reflections.
2. **Set Up Adobe Audition Preferences:**
– Configure your audio hardware settings in the Preferences menu.
– Set the sample rate and bit depth according to your project requirements.
3. **Use a Proper Recording Template:**
– Create a template with your preferred settings, including track configuration, effects, and markers.
4. **Recording Techniques:**
– Record in WAV or AIFF format for high-quality audio.
– Leave a few seconds of silence at the beginning of your recording for noise reduction purposes.
– Monitor your input levels to avoid clipping.
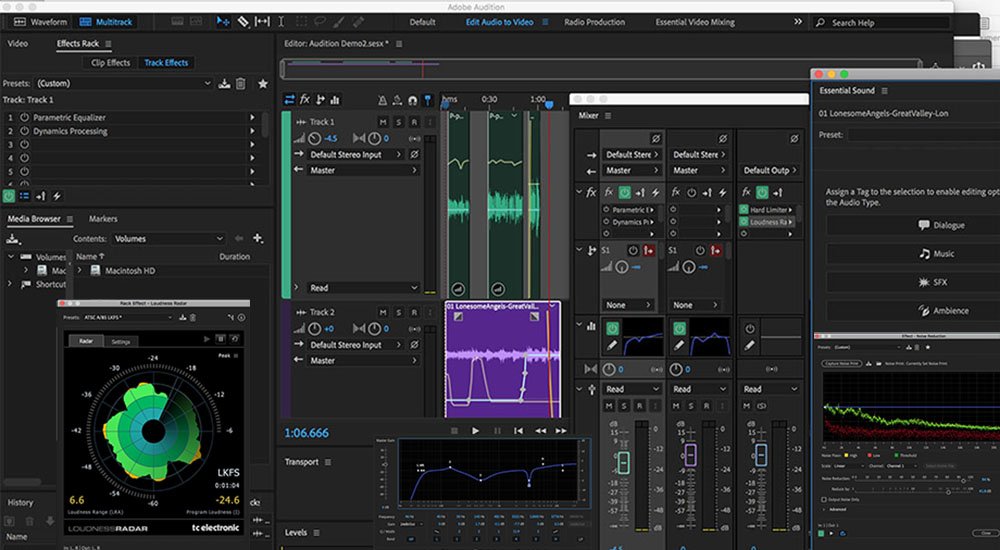
5. **Edit and Clean Up Your Recording:**
– Use the Razor tool to remove any unwanted sections.
– Use the Selection tool to delete background noise or mistakes.
– Utilize the Spectral Frequency Display for visual editing.
6. **Apply Noise Reduction:**
– Use the Noise Reduction effect to eliminate background noise.
– Capture a noise print from a silent portion of your recording and apply it to the entire track.
7. **Equalization (EQ):**
– Use EQ to enhance the tonal quality of your voice.
– Remove low-frequency rumble and high-frequency hiss.
8. **Compression:**
– Apply compression to even out the volume levels of your recording.
– Adjust the threshold, ratio, attack, and release settings to suit your voice.
9. **De-Essing:**
– Use the DeEsser effect to reduce sibilance (harsh “s” and “sh” sounds).
– Adjust the frequency and intensity settings to control sibilant sounds.
10. **Pacing and Timing:**
– Use the Time Stretch tool to adjust pacing and timing if needed.
– Maintain a natural flow in your voiceover performance.
11. **Mastering Effects:**
– Apply a gentle limiter to prevent clipping and control peak levels.
– Consider adding a subtle reverb or ambiance effect for a polished sound.
12. **Save Versions and Back Up:**
– Save different versions of your project as you progress.
– Regularly back up your project files to avoid data loss.
13. **Export Settings:**
– Choose appropriate export settings based on your project requirements.
– Common formats for voiceovers include WAV, MP3, or AIFF.
14. **Tagging and Metadata:**
– Add metadata such as title, artist, and description to your exported files.
– This is useful for organizing and searching for files later.
15. **Stay Updated and Explore New Features:**
– Keep Adobe Audition updated to access the latest features and improvements.
– Experiment with new tools and techniques to enhance your workflow.
By following these best practices, you can maximize the capabilities of Adobe Audition and produce high-quality voiceover recordings.